Real Estate Marketing & Beyond
When we recently purchased our first home - a fixer-upper that we planned to live in, update and convert into a rental property a few years down the road - the kitchen was the one place that I couldn't wait to get my hands on.
After more than doubling the kitchen's footprint by knocking down a couple of walls, I was left with a blank canvas that I knew needed plenty of storage. We filled up an entire wall with locker-style (floor to ceiling) pantry cabinets, did uppers and lowers on both sides of the spacious galley kitchen and were left with a large space for storage above the refrigerator, just begging for a cabinet of its own.
My issue with cabinets above the refrigerator is the fact that far too frequently they're out of reach! And from the side, you have an aesthetically unpleasing picture of shallow cabinets and a refrigerator sticking way out underneath them.
The simple solution is to use a base cabinet above the fridge because at 24" deep, those extend further than standard upper cabinets (12"). However, in our case, we were still nearly 6" shy of the edge of the refrigerator and we wanted the cabinets and fridge to be flush from the side.
At the same time, we were trying to keep costs down and custom cabinets were well outside of our DIY budget. Like many homeowners updating a fixer-upper, we wanted the custom look and feel without the custom price tag!
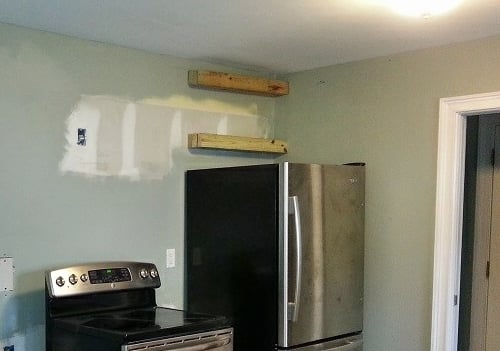
That's when the obvious answer presented itself: Install a dummy block behind the cabinets! We fashioned a "platform" of sorts out of several 2" x 4" boards stacked together to equal the extra depth and mounted the cabinets directly to that.
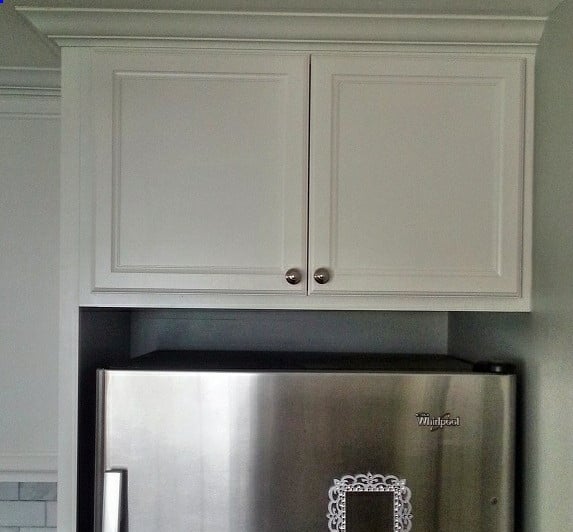
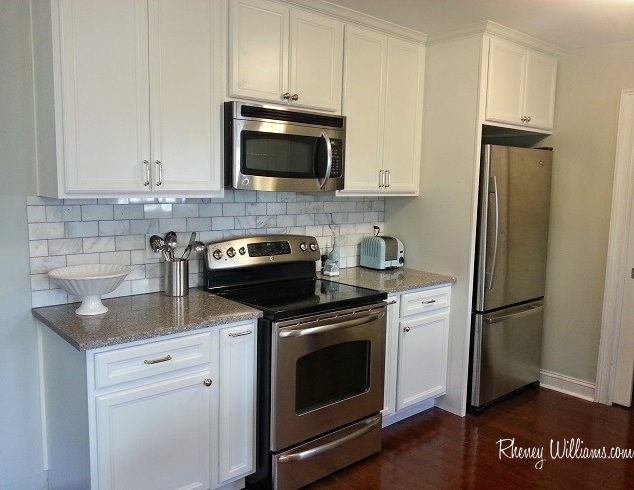
A few components later and here's what we ended up with: Upper cabinets that are flush with the refrigerator. We completed the look by installing a side cabinet panel to encase everything into one seamless section.
And because the back of the cabinets have been "magically" pushed forward, you have plenty of storage space that is still accessible without having to pull everything out of the cabinets and crawl on top of the fridge to get to the back!
Also, you may have noticed from the "Before" photo that the side of the refrigerator is black. We were able to save money by buying that particular model and still get the beautiful stainless steel surface we wanted. By installing the cabinet panel to cover the side of the fridge, you'd never know that it's not completely stainless. And we can feature the fridge's front in all of its gleaming glory!
Finally, we made sure to create an extra-large opening for the refrigerator so that the future homeowners/renters have a few additional inches to allow for a larger fridge.
What are some of the ways you've highlighted appliances without sacrificing storage?
About the author: Rheney Williams writes about DIY home décor projects for Home Depot. Rheney's recently remodeled kitchen in her Charleston, S.C., home, gave her plenty of appliance dŽcor projects to work on, including for her refrigerator. Home Depot's refrigerator page showcases a wide selection of fridges, including the model like Rheney's.